In many of my themes, some folders or files require specific file permissions. I’ve noticed that a lot of users don’t know how to set these permissions and I receive a lot of questions about how to do it.
So, I’ve made this tutorial to help those who don’t know how to do it.
First, for all those who have no idea what permissions are about, here’s a short description:
File Permissions affect the capability of users or group of users to Read, Write or Execute files. They define who or what can read, write or execute the files or directories.
Different files need different file permissions to do the work they are programmed to do.
The permissions of a file or folder can be easily changed by using a FTP client. In this tutorial I’ll use a FTP client named “FileZilla”. It is free and easy to use, but you can use any client out there and it should basically be the same.
So, let’s begin:
1. If you don’t have a FTP client already, download “FileZilla” from here: FileZilla Project and install it.
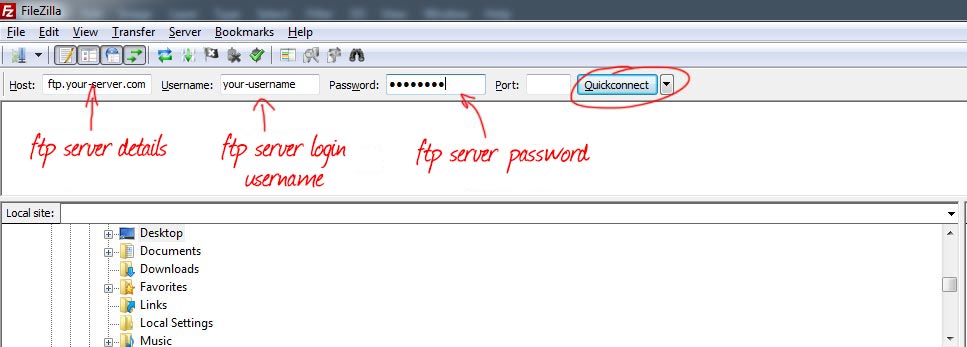
2. Open “FileZilla” and set up your server’s details (you must’ve received the details from your hosting company) and hit “Quickconnect” like in the screenshot bellow:

3. After you connect to the server, in the right window navigate to the location of the file or folder you want to change the permissions for and right-click on it.
4. A pop-up menu that displays the current file permissions will be displayed. You can check the desired permissions boxes or fill in the permissions directly in the “Numeric Value” input. Hit “Ok” and you can see the status of the process of changes you’ve made in the status bar on top.
Done.
More on file permissions here: Filesystem Permissions

